Before I married my husband, I was a divorced, single mother of modest means with two young kiddos. My apartment was mostly furnished with items that I had purchased from Ikea or a few beloved things that I had owned as a young girl. Now, there isn't anything wrong with Ikea and it's products. But, I think that we all know that they aren't meant to last a lifetime. When I moved into my husband's house, he had a few good pieces that were his but most of the furniture in his home left when his ex-wife did. We've limped along for the last five years trying to agree upon a furniture style that suits both our different tastes, but now we are finally putting our house up for sale and we need to fill the empty spots. Furnishing a house is an expensive undertaking, and while I have a much better job and an additional income with my husband, it's still a big financial investment. I have a vision for our future home, especially when it comes to our dining area. I want to have a formal area where we entertain which will tie in the dining set and china hutch that my husband's parents gifted him with and an everyday family dining area with my own set of painted furniture. Until then, my honey has agreed to take one for the team and put his formal furniture into storage until our dream home becomes a reality.
I very much enjoyed refinishing up the furniture that I upcycled and shared here on my blog back in 2014. The French Provincial style with it's elegantly curved lines and beautiful hardware suits both my vintage loving heart and my husband's more formal preference. Since the beginning of 2016, I have been slowly haunting my local Craigslist ads to find more vintage pieces to refurnish and bring into our home. In September, I stumbled across Facebook's marketplace for the first time (where have I been that I didn't know about this?). While scouring the furniture listings, I found a Queen Anne style table & chair set of my dreams with the most gorgeous details on the chairs and table legs. Real. Cherry. Wood. (
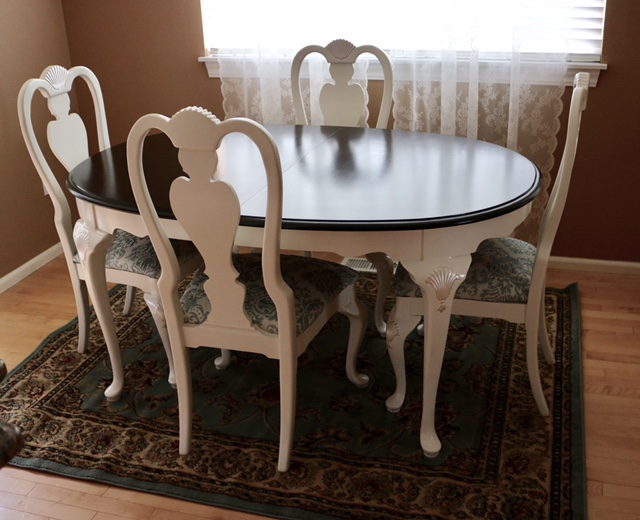
#bestillmyheart) The best part was the low price tag. I had seen similar sets going for anywhere between $800-$1500 but I was able to snap up a table with 2 expandable leafs and 8 chairs for a mere $150.00. I had sold my very first piece of furniture two days prior for $85.00, so this set cost me $65 out of pocket. The gentleman that I purchased them from was super nice and even delivered them for free which I am grateful for as we only have a sedan at the moment. I have finished up the last little details and I thought that I would share with my readers how they turned out today.
Shortly after the Queen Anne set was dropped off, I went on to sell my husband's old table & chair set that his ex-wife left behind for $65 making this set essentially paid for except for the paint and supplies that I used. SCORE!! Here's what that set and old ugly carpet looked like:

Starting with the table, I sanded down the top just enough to rough up the surface topcoat to give the stain that I used something to grab onto. After washing the whole table down and letting it dry, I went to work with General Finishes Java Gel Stain which is my absolute favorite stain to work with. I've already redone several pieces in my home using this same product and fallen deep in love with the results. I've tried several ways to apply it from an old sock to an old rag and then onto a sponge applicator. What works best for me personally is to apply it first with the sponge applicator and then go over it with a small paint roller. This smooths out any lines and gives it a more even and professional appearance. As this is has more of a pudding like consistency and not watery like a traditional stain, this acts more like paint and covers up any wood grain detail in your piece. I actually prefer the dark and silky smooth texture that this product gives, but understand that it might not be the best stain for those who like to see the wood grain detailing in their furniture.
Once the gel stain was fully dry, I started applying General Finishes High Performance Top Coat. Another favorite product from this brand, I love this to seal in and protect my handiwork. As I intend to use this table as an everyday piece and I now have three children and one stepchild, I applied four coats of this product to help prevent against potential silverware damage and spills. This particular top coat has a glossy finish, which means any stains or stickiness left over from my 4-year-old's meals will easily come off with a damp cloth.
Next, I moved on to the apron and legs of the table. I don't normally like painting real wood pieces, so I didn't have much experience with cherry wood prior to this set. I did know that it does have a tendency to bleed though paint, and decided to start with a primer to see how that turned out. I used my trusty Zinsser's Bulls Eye Primer as it doesn't take long to dry. It did a pretty good job of covering up the cherry. I did notice a little bleeding in the area that I had had to sand down due to minor damage that had happened over the years from use. A quick spot touch up with more primer worked nicely and I was ready to start painting.
I had intended to use a milk paint from General Finishes for this entire piece but changed my mind at the last minute and went with the dark gel stain top and a latex paint instead. The paint I chose is Sherwin Williams 0053 Porcelain, a beautiful creamy white. It took me a while to decide on which white to buy, which seems a bit ridiculous because white is such a basic color. But I wanted a shade of white that was neither too ultra bright or too warm. Porcelain is a soft, pretty shade of white that has the perfect neutral undertone. Two coats was all it took on a Saturday afternoon and I left it to dry overnight.
I wanted to do something really special with the details on this set. I had initially thought about going the shabby chic route by sanding a bit over the details and the edges, I also considered using a dark glaze or wax and working it into all the details and corners but decided to go with Modern Masters Metallic Paint in Pearl. I've used their Oyster shade on a few other projects and loved the way that they had turned out at the end. Using a very fine tipped brush that was actually a concealer brush from Crown Brush in its former life, I hand detailed each fan on the four legs with several applications of the metallic paint as it's pretty sheer. Two layers of the same top coat and the table was complete.


To be frank, I was dreading the chairs. I knew that all eight chairs was going to be a lot of work. AND THEY WERE! I felt all 39 of my years for several days after a long weekend of endless hours of work on just four of them. I did the same process as the table with primer, paint and then metallic, following up with the top coat. These beauties not only had the same fan detail in the legs as the table, but another fan shape up at the top of the chair. Just beautiful! And I love how the metallic Pearl paint really accentuates their loveliness.


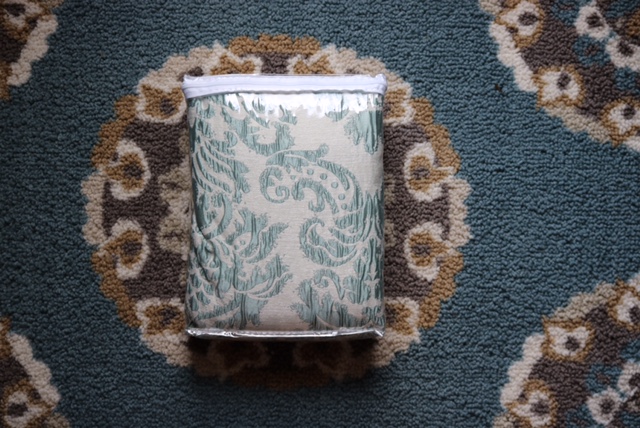
The original seat coverings were in rough shape. The gentleman that I purchased them from was in the middle of gutting his entire house and rebuilding it. There was all kinds of dust and stains all over this set which had not been covered up while he worked. I set about looking for the perfect material to recover the chairs with and actually found what I was looking for from Target. The material I chose has the same aqua blue color in it as a paint I have for another project that I will share on another day. I was excited to be able to find something so similar to tie both pieces together once I'm all done. But, can you tell that these were actually curtains once upon a time? That's right, I made seat covers out of curtains, hehe! I wanted a heavy material that would hold up for daily use and these curtains were nice and thick as they are designed to keep the light out. Target was having a sale on their home goods at the time and I was able to pick up several panels for only $19.99 each. To recover them, I just plunked my seat cushion down, cut the material to fit and held it super tight around the seat form while my husband used his staple gun to tack the material down in place.


I absolutely love my new set! There is something so satisfying in redoing something yourself and turning it into a piece that you will cherish for years to come.
And that brings me to the end of my first blog post and project since I relaunched delicatewhimsy. I hope that I may have inspired you to try your hand at recreating something you love into something you adore even more.
Until next time.